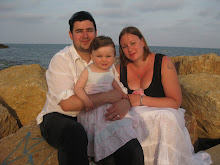
About Me

My photo
I am a full time mummy to an amazing but tiring little toddler of 19mths. We live with faithful daddy, and our 2 cats and 1 puppy. I also work part time as a nurse, and predominately work with children with learning disabilities. I am interested in losing weight, dieting and fitness, and have managed to lose 2 stone since May 2011. I also enjoy reviewing products, especially within the children and weight loss areas.
Showing posts with label entertaining children. Show all posts

Sunday, 21 August 2011

Hand and Footprint Painting, Frog!


Well to start my new section on hand/foot print art, Ive decided to do frogs.  Hand and foot (as well as finger/toes/etc) print art is a really good way to make pictures or cards to give as presents.  They are great to do at any age or stage of development, and for the most part are very easy to do.
What you need:
Green paint (although we used blue and yellow to make green, as this adds more fun to the make.
Green tissue paper
Red and green glitter glue
Googlie eyes
What to do:
First of all we needed to mix the paint (this step is not needed if you are using green paint) we added blue and yellow paint to a plate and allowed her to mix it, to make green.
While she was entertained with mixing the paint, we made a lily pad 
shape with the tissue paper, we then stuck this to the paper (or card if making a card).
Then we painted her foot with a brush (I find this method less messy than just letting her put her foot in the paint!) and added her foot print sideways across the paper (or card if making a card), partly on top of the tissue paper lily pad.  Then we painted her hands and added these upside down on top of the footprint to make the eyes, and allowed the paint to dry.
Once dry we added glitter glue around the lily pad, and a red glitter glue smile, as well as two googlie eyes.

Wednesday, 10 August 2011

Seeing The World, Differently!


This is an idea that Faith completed at one of the playgroups she did, but I have modified it slightly…
What you need:
1 piece of card, we only had orange left, but it works best with black
1 piece of coloured projector paper, coloured sweet wrappers that you can see through (for the eye holes)
Scissors
Glue stick, or better if you have it PVA
Selotape
Stickers or things to decorate.
What to do:
First, we measured her head and made the glasses to fit her, ensuring the eye holes are in the right place!
Then we gave her some stickers and jewels or other decoration bits and the glue covered glasses shape for her to decorate.

Once she had finished, we left it to dry.
Once dry we used the celotape to hold the pieces of coloured projector paper in place over the eye holes.
Then the fun began :) we looked at how different the world looks through the glasses and had great fun.
Other ideas
Try using different colours and talk about the differences.
Its great for identifying colours, objects and shapes.  You can also, with older cover with card and discuss how it might feel to not be able to see.

Sunday, 31 July 2011

Green Fingers!

Well today, we had an impromptu gardening play.  The weather was lovely and the garden did need some attention, and apparently gardening looked very exciting!
What you need:
Flower pots
Gardening gloves
Trowel
Soil
Gravel
Whatever gardening equipment you have
What to do:
We started off by showing her what jobs we were doing and then got her to help us.
Some ideas of what she helped us do;
She helped put the gravel into the pots and areas that needed it (we filled a flower pot with gravel for her to sort out)
She helped weed the patio (although she did prefer pulling up the grass!)
She helped brush the patio (this is a job she always likes to do, although she tends to spread the mess rather than clean it up)
She helped put the piles of weeds in the bin (although she did also try and put some in the sand and water pit)
She also liked to play with an empty flower pot, trowel and gardening gloves.
Other ideas:
We didnt have any plants that needed planting, but getting children to help prepare the area, plant and then water the plants is always a great idea.
A few weeks ago, we picked all the ripe strawberries, which she loved helping with, although none of the strawberries survived!
Watering the garden.
Also making outdoor crafts (will do blogs at some point, with some ideas)


Saturday, 30 July 2011

Messy Foam Play


This is an idea I came across in my day job, and thought it would transfer well to playing with little ones.  We loved playing with the different textures and generally making a mess.
What you need:
Shaving foam
Paints
Paper
Pasta and/or Rice
What to do:
We used  the highchair so that she was contained for the messy play!
Then put some shaving foam, and different coloured paints on her highchair tray so she could make a mess.
We also gave her some paper so she could make ‘pictures’ of her mess.
After she had been playing with the paints and foam for a while, we introduced some dried pasta and rice to introduce a different texture.
Other ideas
I follow a few blogs done by some friends of mine, one of them (rainy day mum) asked how others do messy play.  So I thought I would use this opportunity to say how we do messy play.  We use the highchair, when baking or doing small painting etc.  For larger messy play, water play being a great example, we use the kitchen floor.  Our kitchen floor is wipe clean and dark coloured tiles.  We do now have an issue with using the floor as we have a puppy, so painting projects on the floor are a bit of a no no.

Monday, 18 July 2011

Princess for the day!


After reading the princess and the pea story, I thought it might be fun to be a princess for the day, so we made crowns.
What you need:
A4 coloured card (we choose orange to look like a gold crown)
Scissors
Celeotape
Stickers (you could also use colouring crayons or paint or anything that takes your fancy to decorate your crowns)
What to do:
Cut the paper in half.
Measure against the child’s head to ensure there is enough paper to decorate.
Cut a zig zag pattern across one of the long sides of the hat.
Allow the child to decorate how they please, we used glittery star stickers as they looked like jewels on the crown.
Once they have finished and are dry, selotape the ends together to fit around the child’s head.
Then play!
Other ideas
Make witch or wizard hats, by using a piece of A4 paper and making a cone shape of the childs head (will add a blog on this at a later date)
Its great to go through colours and shapes, while doing this activity.  Its also great for role play activities, such as sitting on a throne, riding a horse, knighting people, playing with castles.

Tuesday, 12 July 2011

Glitter heart hangings


Over the last couple of days we (my 18mth old and myself) have been making glitter heart hangings.  This is how we did it and what they look like…
What you need: 
A4 Coloured card
Glitter glue
Scissors
Coloured thread
Hole punch
Celotape
What to do:
Cut out heart shapes from the A4 card.
Allow the child to decorate the card with the glitter glue.  We decorated one half of the heart and folded them in half to make a pretty pattern.  
Allow the hearts to dry before decorating the back of the heart as you did the front.
Once both sides are dry, hole punch the top of the heart and thread through the coloured thread.  We decided to hang ours in twos, so hole punched the bottom of two of the hearts and thread the coloured thread between this hole and one of the holes in the top of the other hearts.
We hung our finished glitter hearts in the window so they can catch the light.
Other ideas
Try making different shapes to hang.
This is a great activity to discuss colours and shapes and numbers with.  We counted the amount of hearts we had made, and named the colours of the glitter and of the card.  We also talked about different shapes.

Monday, 11 July 2011

Hello and Welcome!

Hello.

I have been blogging on a different site for a while now, but I have some friends on this site and the blogs look so much better, so I have decided to make the move!  I mainly write blogs on a few different subjects so thought I would introduce them here.

The thing that got me into blogging in the first place was a way to track, record and generally blog about my weight loss.  I started following Rosemary Conley in May following an epic 10 year battle with my weight.  I had tried various other forms of dieting before, but never really got anywhere, and for some reason in May I decided enough was enough.  First I tried to get some advice and help from my GP, but they were completely useless.  So I came to the conclusion, that I needed to join a slimming class, and Rosemary Conley's classes seemed to fit into my ideas the best (it includes a fitness class as well as a weigh in and chat on dieting).  I started blogging about 1 and a half months in, and its helped me keep on track so much more!  So I tend to blog on how I am doing weight loss wise, I try to include some kind of goal of the week (not weight based but on exercising or challenging my thinking) Then the following week, I report back on how I have done.  I also have a recipe of the week.  These are all low fat meals that are usually under 400 calories.

Another thing I tend to blog about is things related to my daughter, usually craft ideas or ways to entertain toddlers and children whatever the weather.  I have decided to expand this section now Im changing sites.  So Im planning on including a section on family days out (stuff we get up to on days out, where we go for days out and reviewing local attractions in relation to toddlers and young children).  I also plan on including a section on craft activities as my daughter loves craft! (I also plan on linking in with ideas from other bloggers I know or have read)  Another section on this is going to be hand and footprint art, there is so much that you can make with hand and footprints, I wanted to write down all the ones I have come across and made.  This is also a great activity whatever the age or development of the child.  Which comes to my last part of this section, which is finding fun creative activities to do with children with learning disabilities, I havent come across a lot of sites that cater for their needs, as I work with children with learning disabilities I thought I could come up with some ideas of activities which can work well for them, although can still work well with other children.

The third and final section of my blog is dedicated to reviews.  I like to review products related to things that interest me.  This mainly includes things related to children or weight loss, but I have completed and am happy to complete more reviews on other products.  If you are interested in me reviewing a product for you, then just leave your information at the bottom of this entry.